Resistance Band Workout for Beginners: A Full-Body Routine You Can Do in Your Living Room
A pair of resistance bands costs less than one month of gym membership and fits in a drawer. Here is a beginner-friendly full-body routine, how to pick the right band tension, and the three mistakes that make bands feel useless.
By the Wellspring Daily editorial team · How we check our guides
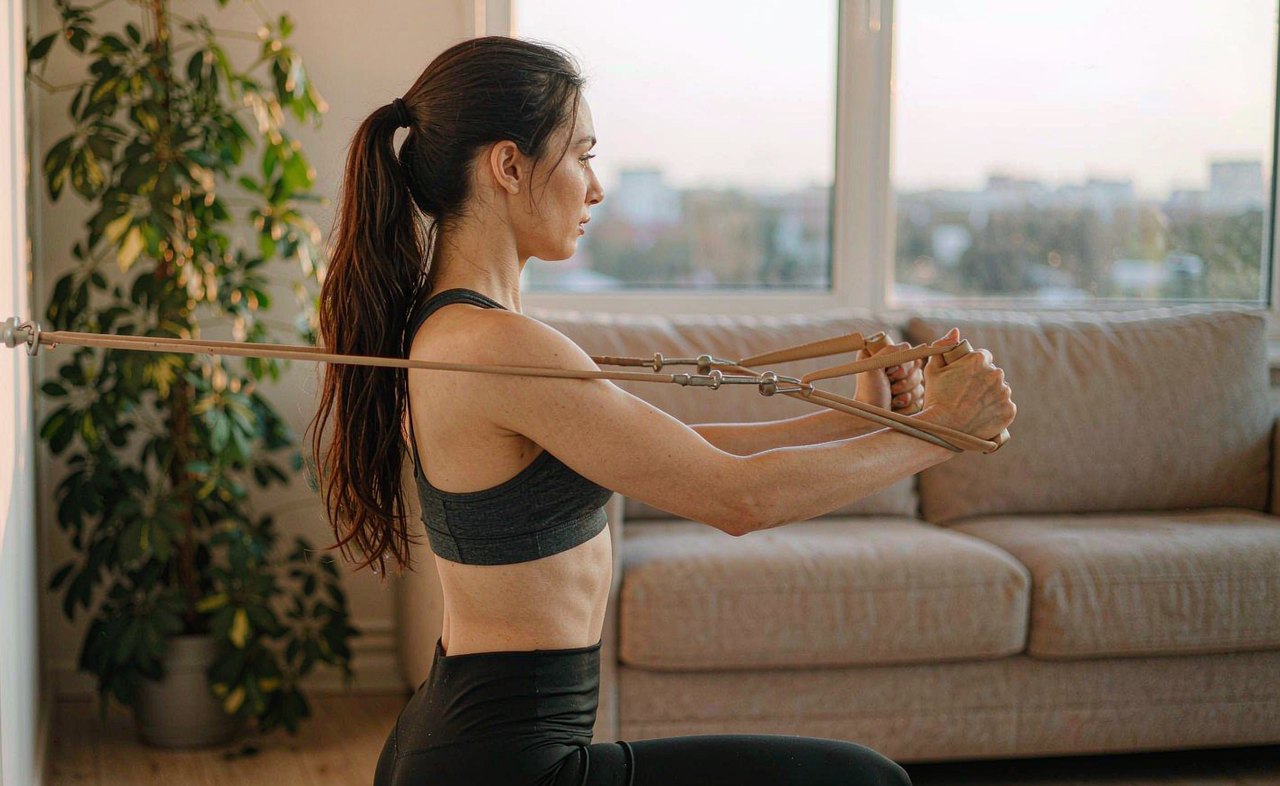
Gyms sell atmosphere as much as equipment, and for a lot of people that atmosphere is exactly the barrier: the commute, the crowd, the monthly fee. Resistance bands remove almost every excuse. They cost very little, weigh nothing, store in a drawer, and — used properly — can load every major muscle group well enough to build real strength as a beginner.
The catch is that most people use bands badly. They pick a band that is far too easy, rep out twenty quick reps while their mind wanders, and conclude that bands "don't count." This guide fixes that. It gives you a full-body routine, teaches you how to judge whether a band is the right tension, and explains the setup details that turn a floppy rubber loop into genuine resistance.
Why bands work (and where they don't)
A band provides resistance by stretching, which means the load is lightest at the start of a movement and heaviest at the end. Free weights do the opposite in many exercises. For a beginner this is actually a feature: the hardest part of the rep is also the part of the range where your joint is in its strongest, safest position, and the easiest part protects you when you are least stable.
Where bands fall short is absolute load. Once you can comfortably handle the heaviest band for every exercise in this routine, you will eventually want to add bodyweight progressions, dumbbells, or harder band configurations. But that is months away for most beginners, not weeks.
What to buy: two bands, not twelve
You need exactly two things: a long loop band (about two metres, often sold as a "pull-up assistance" or "power loop" band) in a moderate tension, and a second one roughly one level heavier. That is it. Tube bands with plastic handles work too, but loops are more versatile and nearly indestructible.
If you are buying in person, the honest test is the row below: you should be able to complete about ten slow reps of a band row with the last two feeling genuinely difficult. If you can do thirty without concentrating, the band is decoration, not resistance.
The routine: six moves, three rounds
Do this two to three times a week on non-consecutive days. Each round: ten to twelve reps per exercise, rest sixty to ninety seconds between exercises, and complete three rounds. Move slowly — two seconds out, two seconds back. Speed is where bands hide their difficulty from you.
- 1. Band row. Anchor the band around a door handle, stair rail, or sturdy table leg at chest height. Hold both ends, step back until the band has tension with your arms extended, then pull your elbows past your ribs and squeeze your shoulder blades together for a beat before letting the band pull your hands slowly forward. This is the foundation move for posture and upper-back strength — the same pattern the posture guide builds on.
- 2. Banded squat. Stand on the middle of the band with feet shoulder-width apart, hold the ends at your shoulders, and squat until your thighs are roughly parallel to the floor. The band is hardest at the top — exactly where squats are easiest without weight — so push all the way up and stand tall.
- 3. Band chest press. Wrap the band behind your back and under both armpits, hold the ends, and press forward from chest height until your arms are extended. If your doorway and anchor allow it, you can instead anchor in front and press away, which feels more natural. Your elbows should finish slightly below shoulder height, not flared up.
- 4. Band pull-apart. Hold the band in front of you at shoulder height with hands about shoulder-width apart, arms straight. Pull your hands apart until the band touches your chest. Small movement, big payoff for the muscles that hold your shoulders back.
- 5. Glute bridge with band. Lie on your back, knees bent, band across your hips with the ends pinned under your shoulders. Drive your hips up until your body forms a straight line from knees to shoulders, squeeze at the top, lower slowly. This pairs naturally with the leg work in the bodyweight home workout if you combine the two routines.
- 6. Standing band overhead press. Stand on the band, bring the ends up to your shoulders, press overhead until arms are straight, lower with control. If your shoulders complain overhead, substitute a lateral raise: band under your feet, raise your arms out to the sides to shoulder height only.
Two minutes of setup that doubles the difficulty
Three details separate people who get results from bands and people who don't:
- Start with slack removed. Before the first rep, position yourself so the band is already under mild tension. If your first inch of movement is free, that inch does nothing.
- Shorten the band to increase the load. Wrapping it once more around your hands, or widening your stance when standing on it, is how you make one band serve as three.
- Control the return. The band should pull your limbs back slowly, never snap them back. If it snaps, you have surrendered half the exercise.
How to progress
Weeks one and two: learn the movements with the lighter band, two rounds instead of three if you are sore. Weeks three and four: three rounds, and if the last rep of any exercise no longer feels hard, switch to the heavier band for that exercise only. After that, add a fourth round, slow the lowering phase to three seconds, or pause for one second at the hardest point of each rep. Strength comes from the last few reps being uncomfortable — not from the total count.
A light stretching session on rest days helps more than most beginners expect; the morning stretch routine slots in well before breakfast on the days you don't train.
Common questions, answered honestly
Bands or dumbbells? For a beginner training at home, bands win on cost, storage, and safety. Once you outgrow the heaviest band you own, that is the natural moment to add weights — not before.
Will this make me bulky? No. Building visible muscle mass takes years of progressive overload and a deliberate calorie surplus. What you will notice in six to eight weeks is that stairs, groceries, and posture all feel easier.
Can I train every day? Your muscles grow between sessions, not during them. Two to three sessions a week with rest days between beats six fatigued ones — the same recovery logic explained in the energy guide.
The band smells like rubber / leaves marks — is that normal? Natural latex does. Wipe it down, store it away from sunlight, and consider a fabric-covered band if your skin is sensitive.
Who should check with a professional first
A conversation with a doctor is sensible before starting any new strength program if you have high blood pressure that is not well managed (band training involves breath-holding temptation — keep breathing throughout), a recent injury or surgery, significant joint pain, or pregnancy. Bands fail by snapping: always inspect for cracks before use, never anchor one to a sharp edge, and never release a stretched band toward your face.
This article is general health information, not medical advice. It cannot account for your individual circumstances — when in doubt, or if you have any of the conditions above, consult a qualified healthcare professional before starting a new exercise program.
A note on health advice
This guide shares general wellbeing information based on published guidance and personal testing. It is not medical advice. If you have a condition, are pregnant, or feel pain during any movement, check with a qualified professional before starting.